Users having a Windows device can use the WinSCP FTP client to transfer files to Egnyte. In this article, we will walk users through installing and setting up the client, how to upload files once it is installed, and provide the firewall recommendations to ensure the process goes smoothly.
For background information about uploading files using FTP and access to other FTP configuration guides, see this FTP Overview article.
If more than 50GB data total to transfer, consider using Egnyte's Migration App or some other third-party tool designed to handle larger data migrations.
Exclusions: Refer to this article for unsupported characters and excluded file types that will not be transferred.
Installation
Upload Files
Firewall Recommendations
Installation
- Install the latest version of WinSCP. Opt for the commander mode during the install wizard.
- For password-based authentication - On the New Site page, choose FTP or SFTP from the File Protocol drop-down.
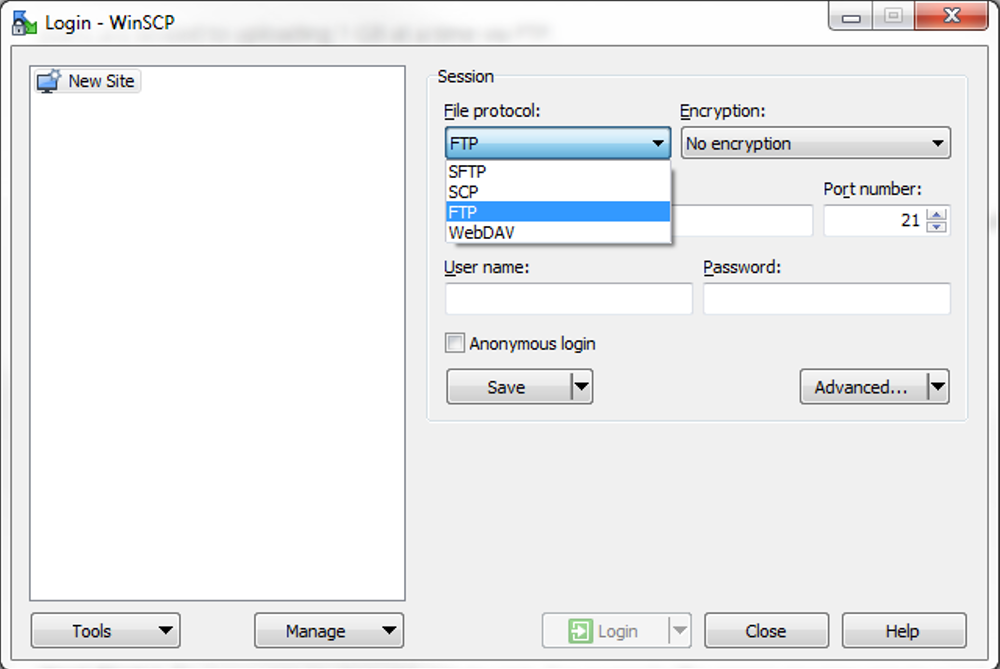
- Select TLS/SSL Explicit encryption from the Encryption drop-down.

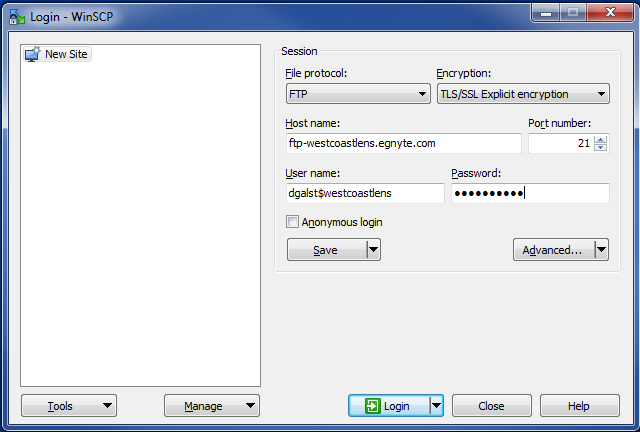
- Complete the remaining blank fields in this screen:
- Host Name: ftp-[Egnyte domain].egnyte.com. For Example: ftp-acme.egnyte.com
- Port Number: 21 (FTP) or 22 (SFTP)
-
User Name: [Egnyte user name]$[Egnyte domain]. For Example: jsmith$acme
If FTP Client does not support $ symbol then use any of the following symbols: % # | @ &
-
Password: Egnyte password.
SSO authenticated users will have to set a “Non-SSO” password that is only used for FTP. This can be done from the My Preferences tab under My Profile in the Egnyte Web UI. Instructions for this can be found here
- Account: leave this blank.
-
When done setting up this page, it might look like this:
Too many incorrect password attempts may temporarily block the access for security reasons. If this happens, wait for some time before trying again with the correct password.
- If the Egnyte account has authenticator app-based MFA enabled, WinSCP will automatically prompt for both the password and a two-step verification code when connecting via SFTP. Enter password in the Password field and authenticator app code in the Two-step verification code field. No additional configuration is required. See SFTP with MFA (Authenticator App) for more details.
-
For SSH Key-based SFTP authentication setup with WinSCP, perform the following:
- On the New Site page, choose SFTP from the File Protocol drop-down.
- Host Name: ftp-[Egnyte domain].egnyte.com. For Example: ftp-acme.egnyte.com
- Port Number: 22
- User Name: [Egnyte user name]$[Egnyte domain]. For Example: jsmith$acme
-
Password: Leave it blank
- In the Login window, click on Advanced and the Advanced Site Settings will then appear.
-
Browse and select Private key file.
-
WinSCP uses PuTTY’s key format (.ppk), and PuTTYgen is the tool that creates and converts those keys, but even selecting an OpenSSH key format file will prompt an option to convert the OpenSSH private key to PuTTY format. If prompted, click OK.
-
A prompt will then appear to save the converted private key to a preferred location.
-
After selecting a location, a confirmation message appears. Click OK.
-
The Login window reappears. Click Save, then click Login.
- WinSCP uses binary transfer mode and preserves timestamps by default. To change these settings, navigate to Tools > Preferences > Transfer.

- Select Binary, then click Edit to modify the timestamp preservation setting in the dialog box.
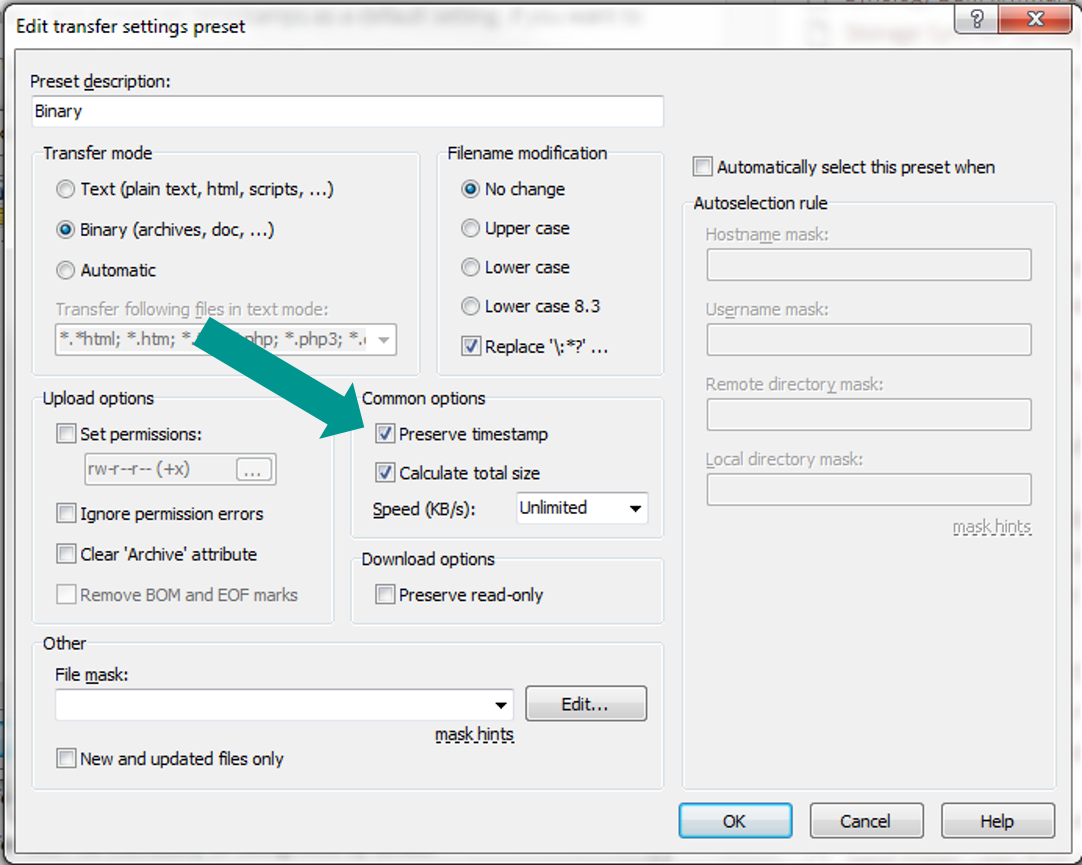
- Navigate to Advanced Site Setting.
- Open the Connection page and verify the box next to Passive Mode is checked.
Upload Files
- After connecting, browse the local drive in the Local Site window on the left. Drag and drop the files into the appropriate folder in the Remote Site window on the right. (For example; /Shared/Documents).

Egnyte allows up to six concurrent FTP transfers per user. This limit can be adjusted at the following location:

Firewall Recommendations
If firewall restrictions block specific ports, allow outbound traffic on FTP port 21. Egnyte uses the following ports for data transfer:
- 10000-12000
- 20000-22000