Enabling the Salesforce Integration for custom objects involves creating Egnyte Sync Configurations for those custom objects. The Egnyte for Salesforce package can automatically create these configurations for you, however, it is not possible to directly create Apex triggers or test classes in some production organizations. If this is the case, the following guide can be used to deploy the custom object sync Egnyte Sync Configurations to enable the integration of custom objects.
Create Egnyte Sync Configurations for custom objects in a sandbox organization
Create an Outbound Change Set in your sandbox organization
Upload the Outbound Change Set
Deploy Inbound Change Set in your production organization
Create Egnyte Sync Configurations for the custom objects in your production organization
Create Egnyte Sync Configurations for custom objects in a sandbox organization
- Install the Egnyte for Salesforce package in a sandbox environment.
Note: You don't need to connect your Egnyte domain to the package or run through any of the post installation steps described in the Installation guide. You will only install the package to automatically create the required triggers and test classes.
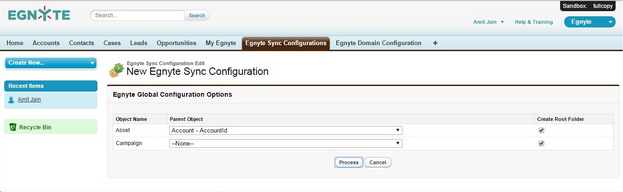
- Open the Egnyte Sync Configuration tab in your sandbox organization and click on New to create a new Sync Configuration record.
- Add the selected custom objects and set the Auto-generate Trigger option to Yes.

- Click Continue then Process to create the triggers and test classes for the custom objects.
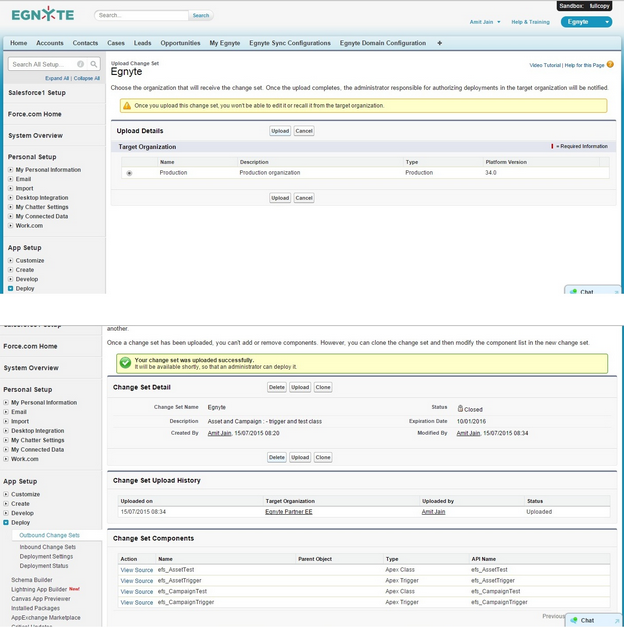
Create an Outbound Change Set in your sandbox organization
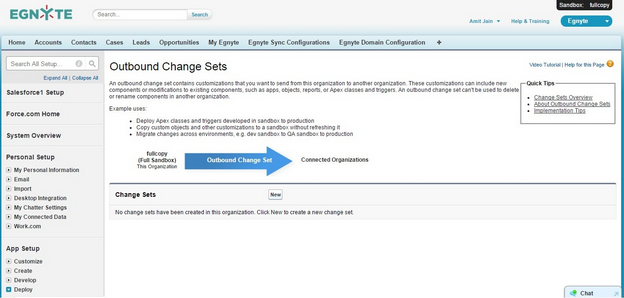
- Search for Outbound Change Sets in the setup section of your sandbox organization.
- Click New to create an Outbound changeset. Enter a name and description and click Save.
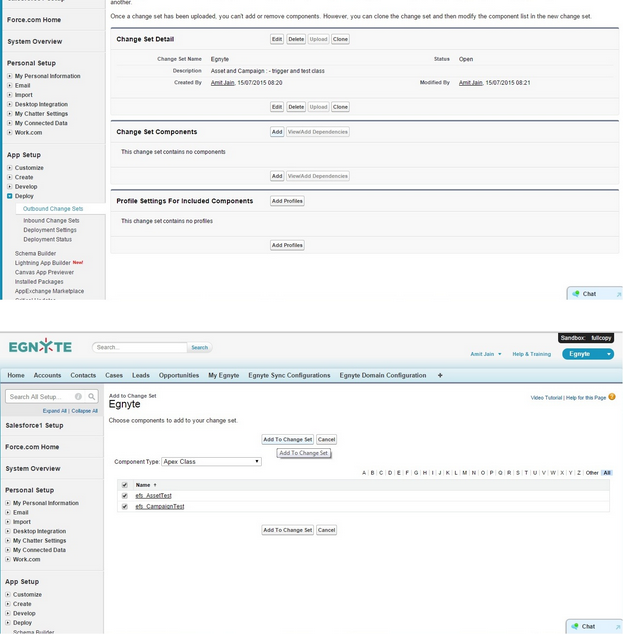
- After creating the changeset, click on Add in the Change Set Components section to add the apex trigger and test class components that were created as part of step 1.
Upload the Outbound Change Set
- After adding all the components, select the Upload option.
- Select the production organization where you want to deploy the triggers and test classes and click Upload again.
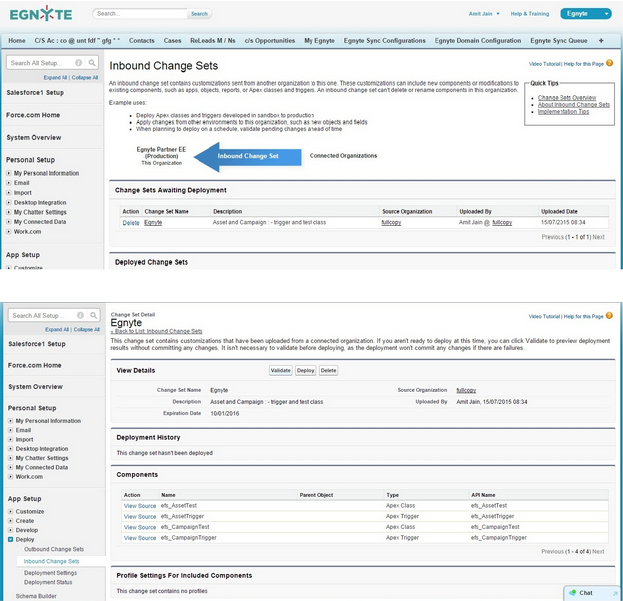
Deploy Inbound Change Set in your production organization
These steps should be performed by your production organization.
-
Search for Inbound changesets in the setup section in your production organization.
-
Select the changeset that was uploaded from the Sandbox organization and click Validate to check if there are any errors in deployment.
Note: If the validation does not succeed due to custom validations in your organization, you will need to manually change the generated triggers and test classes to pass your custom validations before repeating this step.
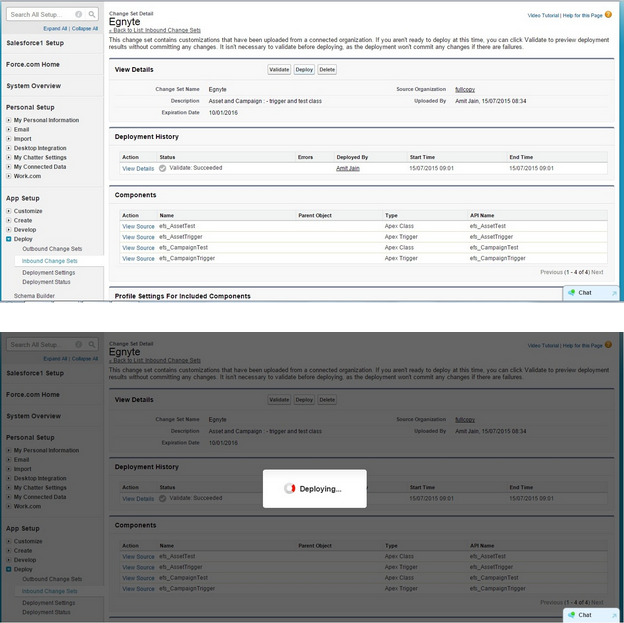
-
After validation, click Deploy to make the components available in your production organization.
-
You can check the deployment status of your changeset.
Create Egnyte Sync Configurations for the custom objects in your production organization
- Open the Egnyte Sync Configuration tab in your production organization and click New to create a new Sync Configuration record.
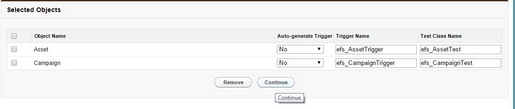
- Select the same custom objects you specified in step 1, but this time choose No for the Auto-generate Trigger setting. You need to enter the name of the apex triggers and test classes that were deployed from the sandbox environment.
- After specifying the triggers and test classes for custom objects, select Continue then Process to generate the Sync configurations for the selected custom objects.
Note: You can always change settings related to the configurations from the Egnyte Sync Configurations tab in your production organization.